为了写博客方便些 搞了这个图床 方便易用
现在很多 markdown 编辑器或者图床管理工具可以使用 Github 来作为图床使用。
超级好用
前提是网络通畅哦
1,下载uPic
介绍:
They can automatic uploading local file and screenshot, meanwhile the menu bar shows the uploading progress constantly. File's link will automatically copied to the clipboard when finish upload, make you insert pictures quickly when you are blogging or chatting. Link’s format can be a normal URL, HTML or Markdown, it's totally up to you.
无论是本地文件、或者屏幕截图都可自动上传,菜单栏显示实时上传进度。上传完成后文件链接自动复制到剪切板,让你无论是在写博客、灌水聊天都能快速插入图片。 连接格式可以是普通 URL、HTML 或者 Markdown,仍由你掌控。
<img src='https://ffffourwood.cn/usr/uploads/uPic/k4B3fn.png' alt='k4B3fn'/ width="200px" style="margin:0 auto">
功能强大,支持图床: smms、 又拍云 USS、七牛云 KODO、 阿里云 OSS、 腾讯云 COS、 百度云 BOS、微博、Github、 Gitee、 Amazon S3、Imgur、自定义上传接口、...
下载安装方法:
MAC:
brew cask install upic如果下载不下来直接手动在github上下载github
windows:
暂无windows版本 ,可用PicGO代替
2,登陆github新建仓库
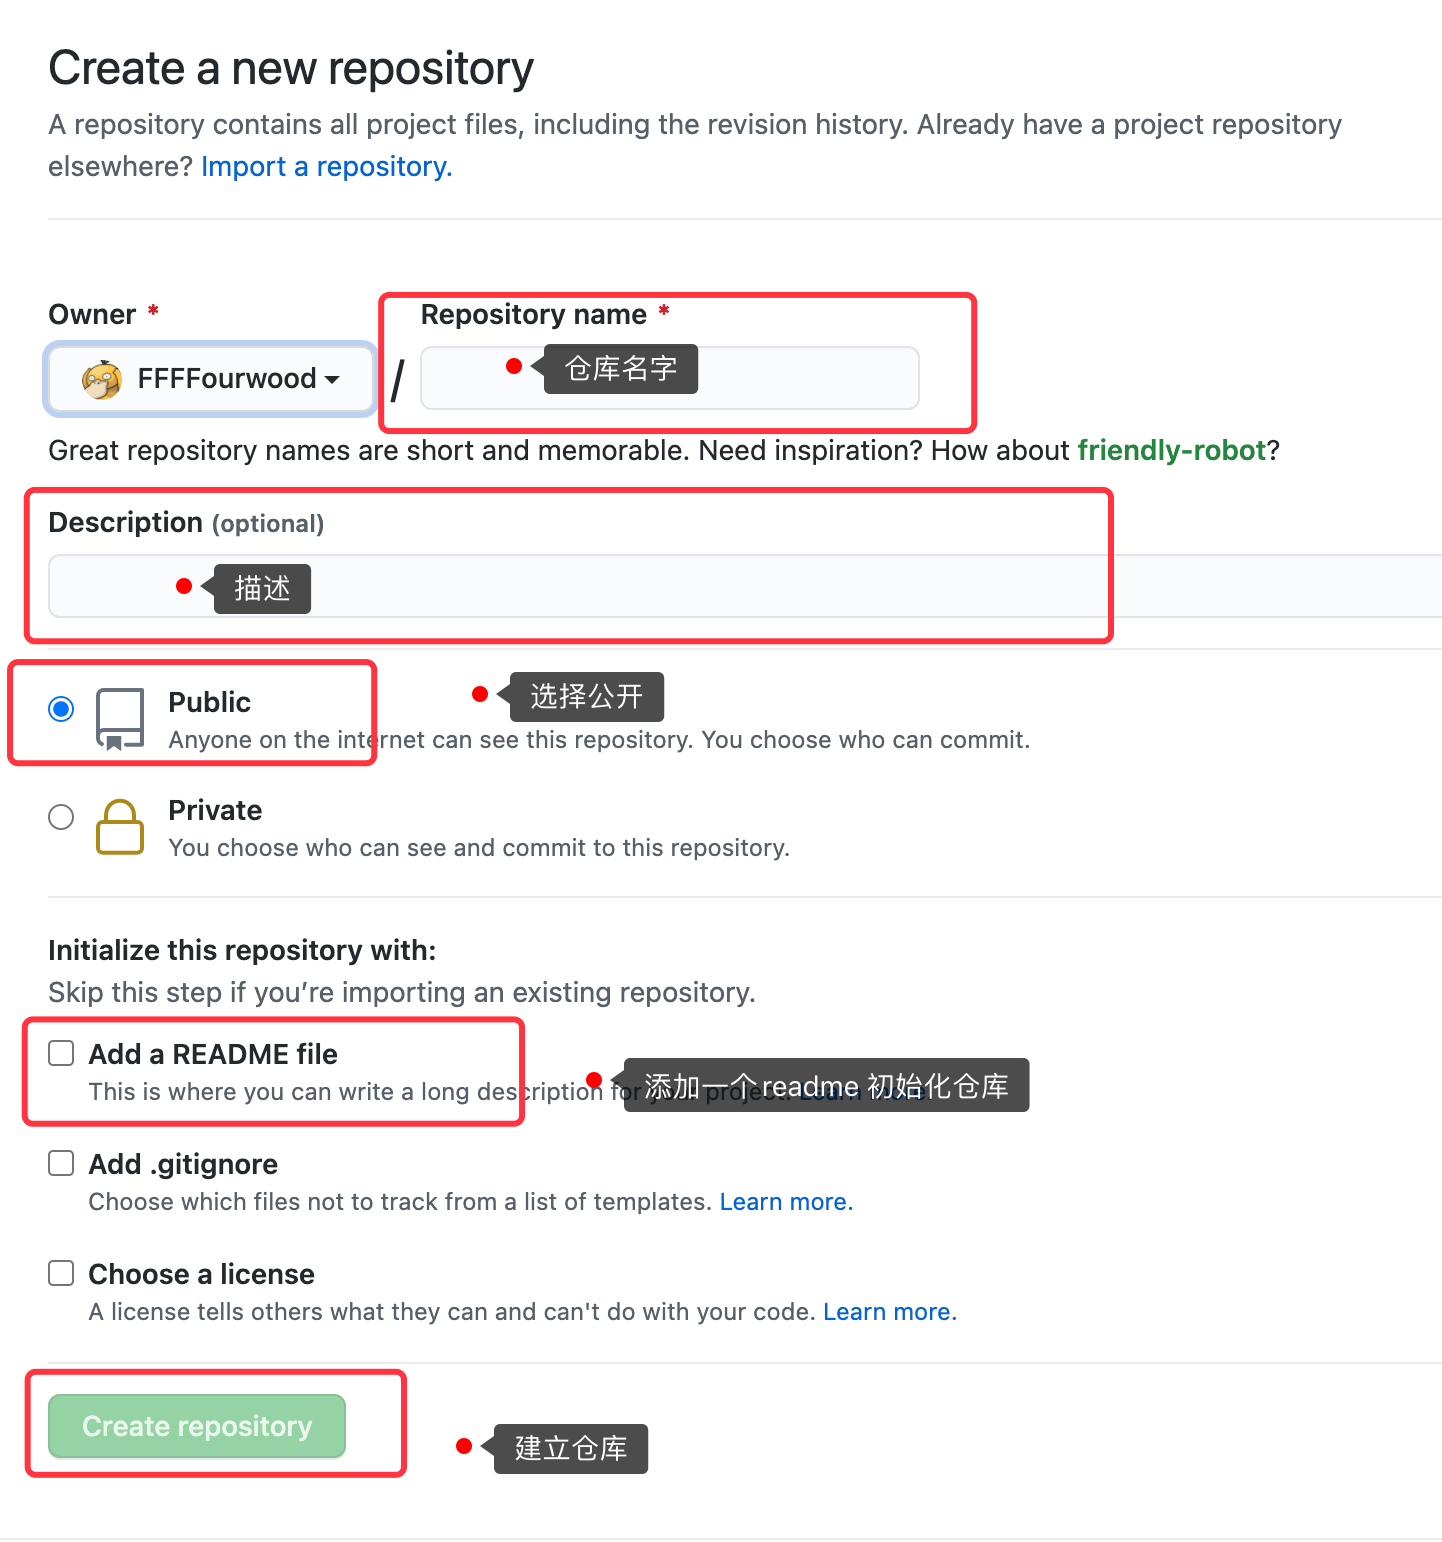
3,生成一个Token用于操作GitHub repository
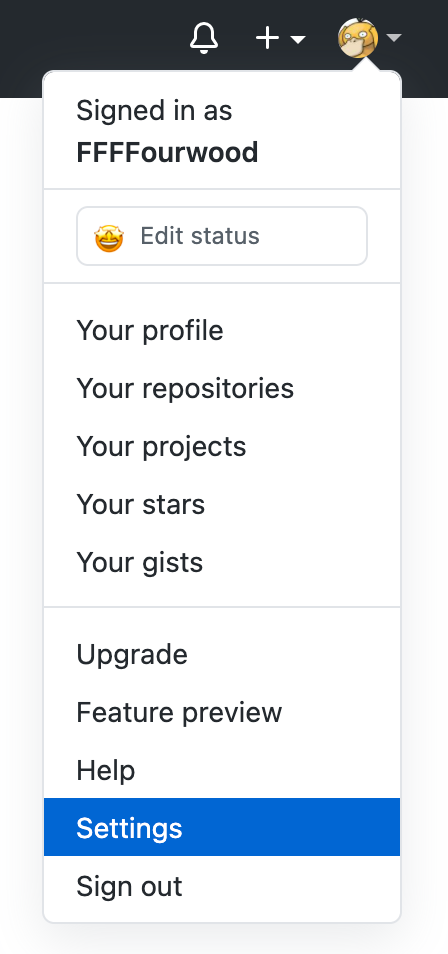
选择设置按钮
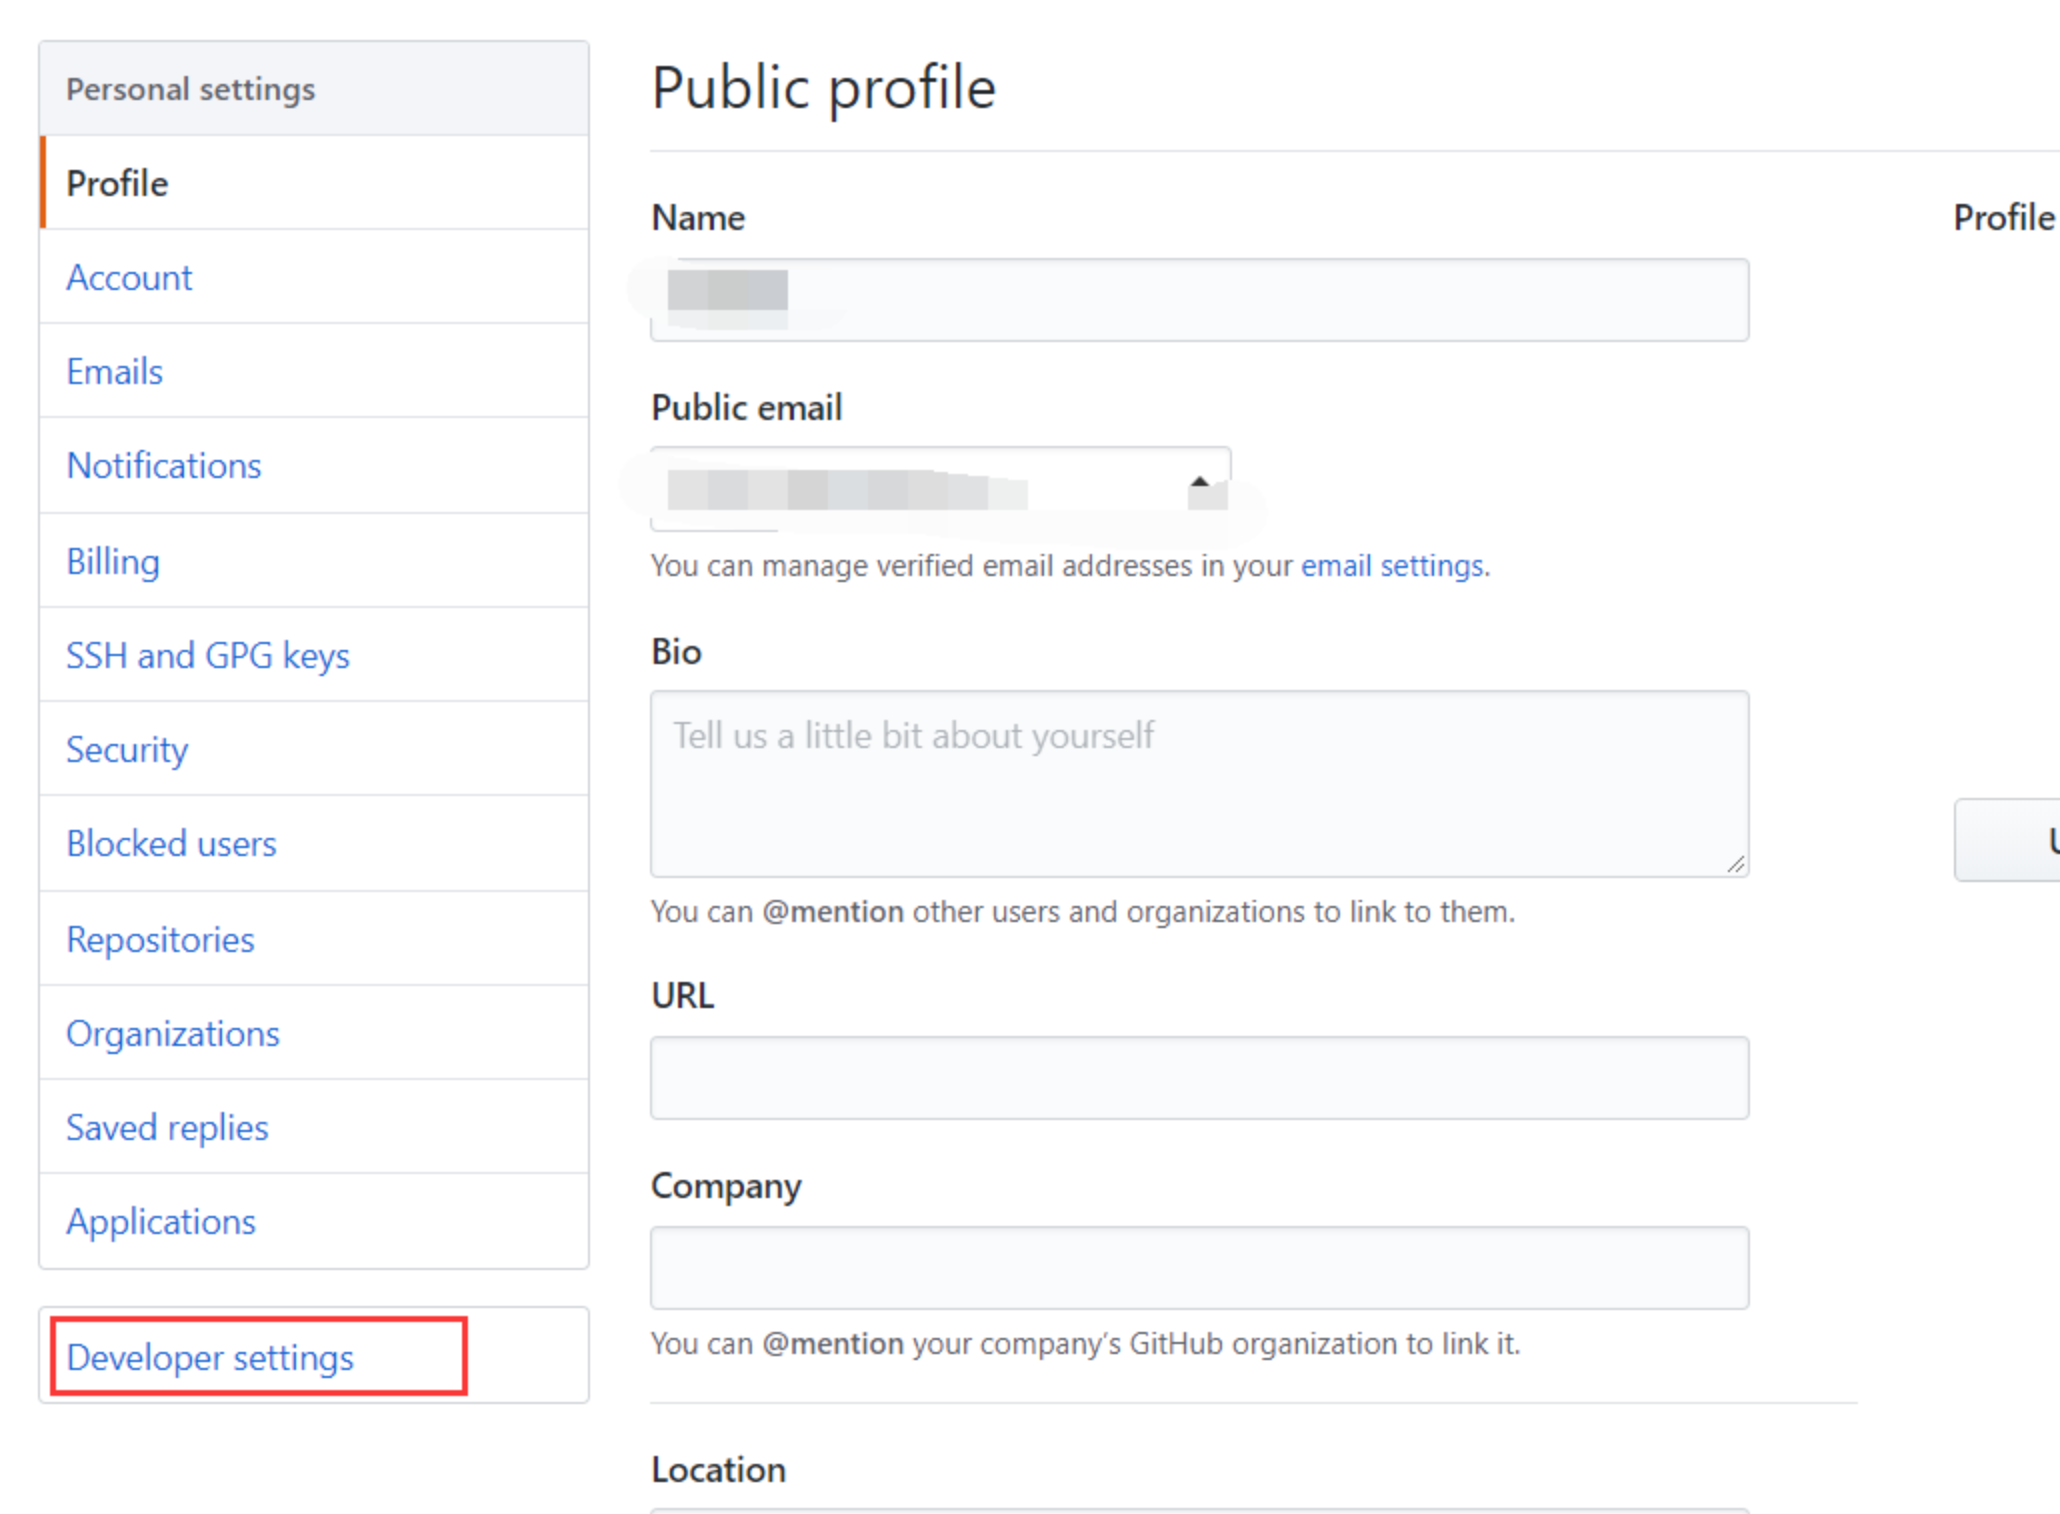
进入页面后,点击"Developer settings"按钮

创建新的token
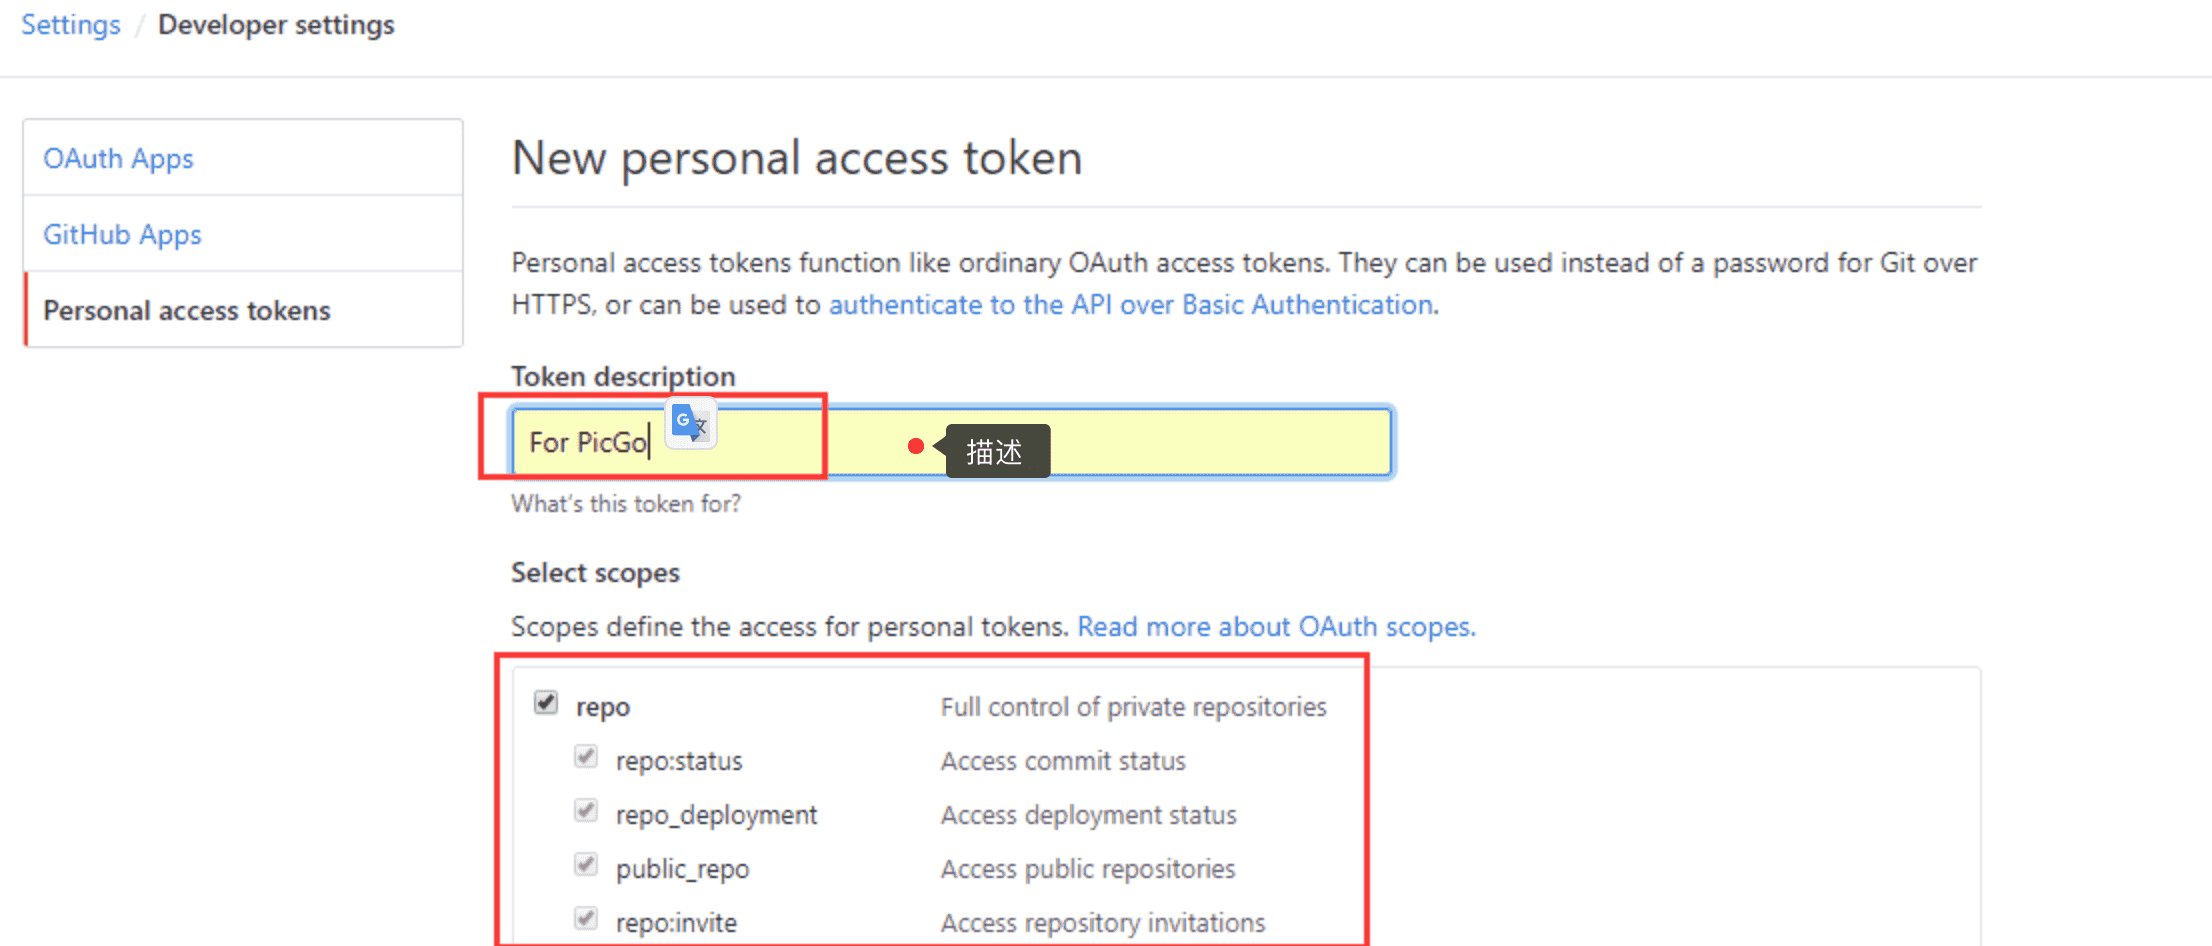
填写描述,选择"repo",然后点击"Generate token"按钮
注:创建成功后,会生成一串token,这串token之后不会再显示,所以第一次看到的时候,就要好好保存4,配置PicGo
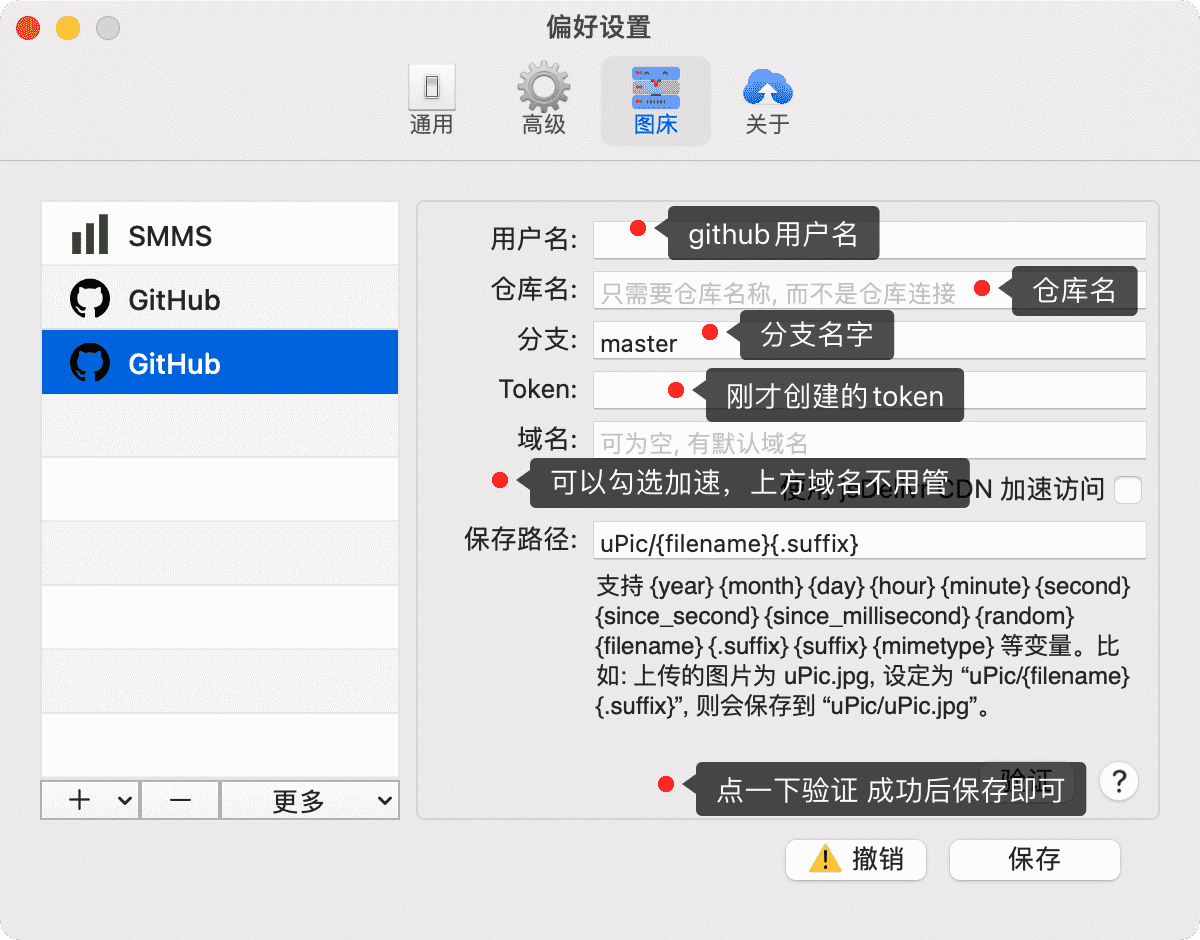
之后在配置一下
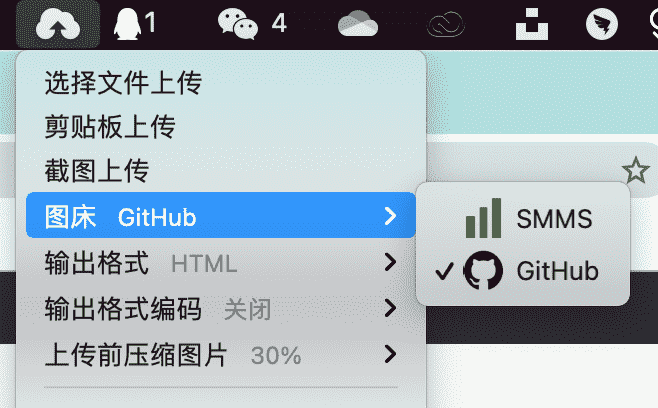
然后就可以正常使用咯


虽然看不懂,感觉很凶的样子。
虽然看不懂,感觉很凶的样子。